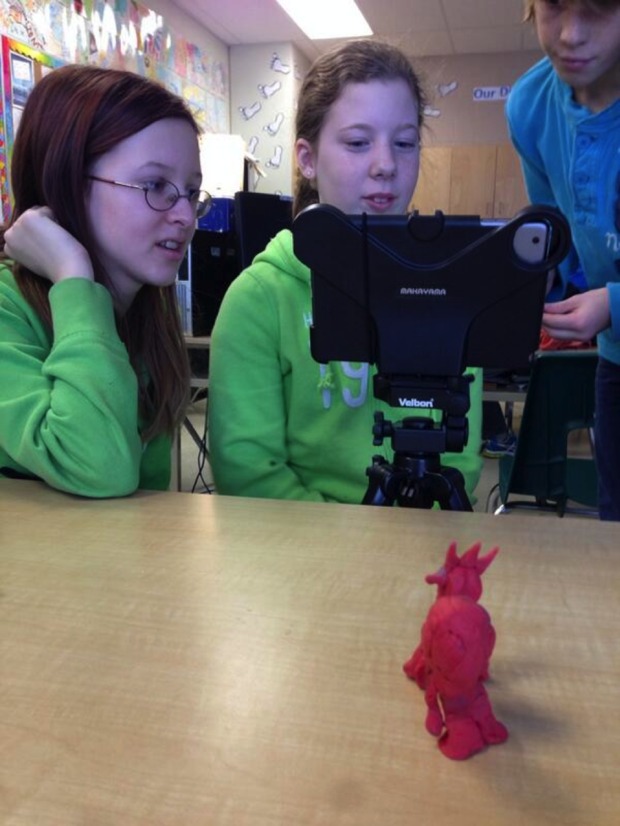
David Carruthers, a faculty member at Mitchell Hepburn P.S., has been teaching for 12 years. For the past two, he’s been using iStopMotion with his Grade 7 students. He recently discovered the iStopMotion for iPad app and decided to integrate it into his lessons.
“Having used iStopMotion for the Mac a couple years ago with such great success, I knew that this was a program I wanted to use on our school’s new iPads,” David says.
The project David chose for his students was to be a collaborative effort by his students and the students in a Grade 1 class. The Grade 1 students created storyboards (with the assistance of their teacher), and then David’s students stepped in to help. They teamed up with their new young friends to assist with the creation of clay characters and backgrounds for their stop motion movies. Finally, everyone worked together using iStopMotion to come up with the final product.
“Our favorite feature is the onion skinning, which allowed my movie makers to see the previous image,” David says. “This was really helpful in deciding where to position characters in the next shot. Recording voiceovers was also very easy to accomplish with the record feature.”
Since the students used clay with this project, David would love to try using LEGOs to see what else they can come up with. He also plans to help other teachers who are interested in using iStopMotion with their own students.
“The use of technology in the classroom must be combined with good pedagogy,” he says. “By using iStopMotion for my most recent project, students were able to create a product previously inconceivable without Boinx’s software. This transformative process is very powerful. It provided the Grade 1 students with an opportunity to see their stories come to life, and they were thrilled!”
David recommends teachers spend a lot of time planning before handing the iPads over to their students. He says that if possible, the iPad should be mounted for stabilization. From his own experience, he suggests putting it on a tripod (we agree!). He also recommends that the teachers model how to make students’ characters move subtly, as it will reduce the choppiness of the final video.
Congratulations to the team over at Mitchell Hepburn! Are you looking to take a leaf from David’s book and try bringing iStopMotion into your own classroom? Here are some of our tips for a flawless lesson:
As David mentioned, try stabilizing your iPad by using a tripod, a stack of heavy books or whatever you have on hand to help prop and steady your iPad. It makes the final animation look smooth and professional, and it’s also a lot easier when moving your characters.
In the case that your iPad does move around during filming (it’s bound to happen!), just use iStopMotion’s onion skinning feature to move everything back exactly where it was in the previous frame.
Make sure to have a lot of materials on hand for spur-of-the-moment inspiration! We’ve seen colored paper, clay, LEGOs, feathers, grass, leaves and much more used in iStopMotion videos, and we find that the more innovative you are, the more interesting the final product looks.
Try experimenting with lighting. Different light bulbs will have different effects on the scene, and sometimes using one is better for consistency. Stop motion animation takes patience. Remember that if you’re working with natural lighting, it will get darker out as time goes on, changing the shadows and colors of your project. Note: Depending on your project, this can be a good thing! See what works best for you.
We’ve heard some great success stories due to storyboarding. This is when you plan out exactly how you want your film to look scene by scene so you always know your next move. It’s especially helpful for students working in a team. It also gives some great incentive to keep working toward the final product!
Do you have any additional suggestions? We’d love to hear from you. Happy animating!


